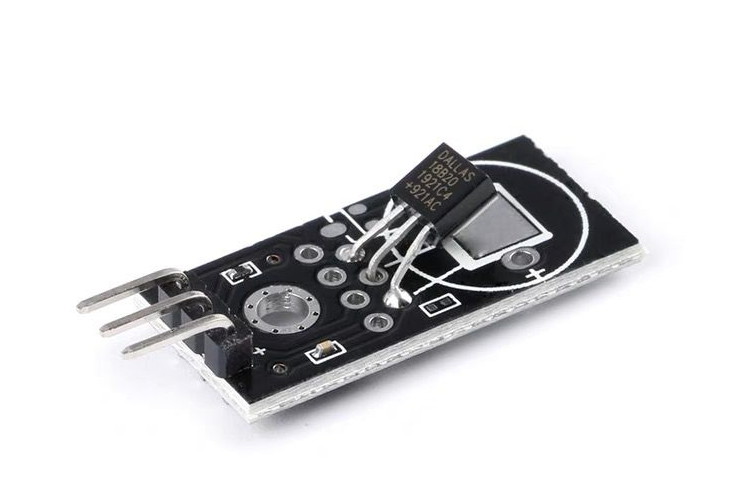
说明
这段代码你需要安装OneWire.h,DallasTemperature.h库,esp_sleep.h库,HTTPClient.h库
实现的功能
将温度数据每3秒发送到服务器进行处理
并在3秒等待时间进入深度睡眠,然后通过定时器唤醒
Arduino代码
#include <WiFi.h>
#include <OneWire.h>
#include <DallasTemperature.h>
#include <esp_sleep.h>
#include <HTTPClient.h>

// DS18B20 数据引脚连接到 ESP32 的引脚(这里假设为 15 号引脚,按需修改)
#define ONE_WIRE_BUS 15

OneWire oneWire(ONE_WIRE_BUS);
DallasTemperature sensors(&oneWire);

// 温度传感器读取间隔
const long interval = 3 * 1000;
unsigned long previousMillis = 0;

// Wi-Fi 配置
const char* ssid = "Xiaomi_FANFAN";
const char* password = "yangfan0522";
const char* serverUrl = "http://192.168.31.108:5000/temperature"; // 后端接收接口

void setup() {
  Serial.begin(115200);

  // 连接 Wi-Fi
  WiFi.begin(ssid, password);
  while (WiFi.status() != WL_CONNECTED) {
    delay(1000);
    Serial.println("连接到 Wi-Fi...");
  }
  Serial.println("已连接到 Wi-Fi!");

  // 初始化温度传感器
  sensors.begin();
}

void loop() {
  unsigned long currentMillis = millis();
  if (currentMillis - previousMillis >= interval) {
    // 读取温度
    sensors.requestTemperatures();
    float temperature = sensors.getTempCByIndex(0);

    if (temperature == DEVICE_DISCONNECTED_C) {
      Serial.println("温度传感器未连接或出现故障!");
    } else {
      Serial.print("当前温度: ");
      Serial.print(temperature);
      Serial.println(" °C");

      // 发送温度数据到 后端
      HTTPClient http;
      http.begin(serverUrl); // 后端 URL
      http.addHeader("Content-Type", "application/json");

      String payload = String("{\"temperature\":") + temperature + String("}");
      int httpResponseCode = http.POST(payload);

      if (httpResponseCode > 0) {
        Serial.print("温度发送成功,响应码: ");
        Serial.println(httpResponseCode);
      } else {
        Serial.print("温度发送失败,错误码: ");
        Serial.println(httpResponseCode);
      }

      http.end();
    }

    previousMillis = currentMillis;

    // 进入深度睡眠,设置唤醒时间
    esp_sleep_enable_timer_wakeup(interval * 1000);  // 参数单位为微秒
    Serial.println("进入深度睡眠...");
    esp_deep_sleep_start();
  }
}
后端代码
你可以使用任何语言,只需要写一个接口/temperature,post获取temperature参数值即可,下面是flask接口例子
from flask import Flask, request, jsonify

app = Flask(__name__)

@app.route('/temperature', methods=['POST'])
def receive_temperature():
    data = request.get_json()
    temperature = data.get('temperature')

    if temperature is not None:
        print(f"收到温度数据: {temperature}°C")
        return jsonify({"status": "success", "message": "温度数据已接收"}), 200
    else:
        return jsonify({"status": "error", "message": "未收到温度数据"}), 400

if __name__ == '__main__':
    app.run(host='0.0.0.0', port=5000)
© 版权声明
THE END









暂无评论内容